Bed Bug Proofing and Prevention Tips for Your Home
Article by Joseph Salvatore Knipper
A person’s home is their castle, and a good castle needs defenses.
While it’s technically impossible to make a home or apartment 100% bed bug proof, here are 7 steps you can take to turn your apartment into a mighty fortress bed bugs will have a difficult time besieging.
(Safety Disclaimer: It is vitally important you use all tools and bed bug prevention products as directed by their manufactures and/or the EPA. While some safety guidelines are common sense, others require a bit of reading.)
#1: Repair Your Castle Walls
What you’ll need:
- Caulk gun
- Damp rag
- Fine-grade steel wool
- Putty knife
- Plaster or spackling putty
- Paint scraper
- Door sweep
- Good ventilation
- Optional tools: paint, paint clothes, gloves
The first step in bed bug proofing and prevention is to make sure bed bugs aren’t spreading to you from neighboring apartments.
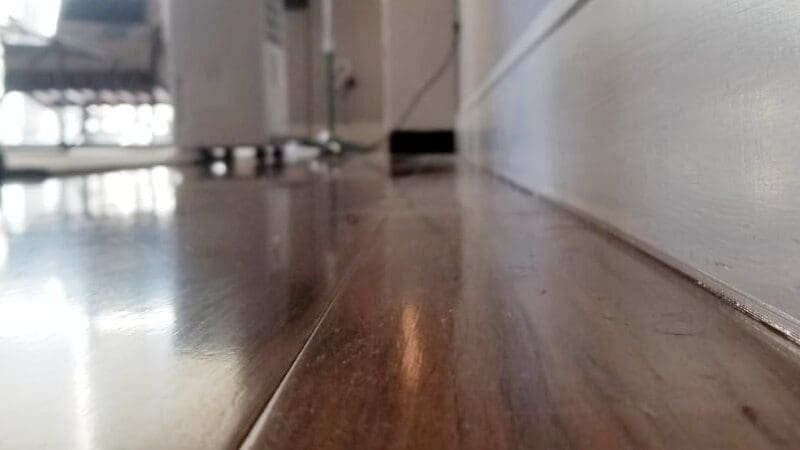
Seal up any cracks in your wall with plaster or spackling putty. Caulk around your baseboards where they meet the floor (Note: I speak from personal experience when I say caulking is difficult to do neatly on the first try. Watch some instructional videos first).
As the temperature shifts over the year, cracks may appear again. Be sure to inspect your work yearly and re-caulk/plaster as necessary.
Any good castle wall needs a portcullis, so be sure to install a door sweep or draft stopper on the bottom of your door. This will discourage bed bugs (or any bugs really) from crawling under the door.
Bonus tip: Stuff fine-grade steel wool in the gap where the radiator pipes meet the floor and the ceiling. (Make sure the radiator isn’t hot before you begin). This will also discourage other insects.
Approximate cost to your treasury: $9-$12 per tube of eco-friendly caulk. Paint can cost $15-$40 per gallon. All other supplies can be purchased for less than $5 each.
#2: Fortify Your Keep
What you’ll need:
- Bed bug-proof encasements for mattresses and pillows
- A second pair of hands.

A keep is the extra-fortified heart of the castle. Your bed is your keep— a line of defense you’ll want extra protection around.
This is why mattress encasements (also called “protectors”) are such an important tool. Mattress encasements are special covers for your mattresses which prevent bed bugs, dust mites and/or allergens from taking up residence in your mattress. There are also models to fit box springs, futons, pillows, and even pet beds.
Bed bugs can’t chew, so as long as the encasement material is tightly woven enough to prevent them from crawling through, it should keep them out. However, bed bugs are very good at getting between even the smallest spaces.
When selecting mattress encasement, you should look for models that are scientifically proven to be both bite-proof and escape-proof. Look also for small-tooth zippers that lock into place, as bed bugs can fit in between large-tooth zippers..
Be careful not to tear encasements when installing them; you’ll probably need a roommate to help you lift things. If you have a metal frame, consider using duct tape to cover sharp edges first. Check encasements regularly for tears when you change your sheets.
Approximate cost to your treasury: $25-$50 per mattress or boxspring encasement. $10-$20 per pillow encasement
#3: Set Up a Killing Field
What you’ll need:
- Time
- Recycling bin
- Optional tools: outlet covers, reusable storage bins, paint, paint scraper, paint clothes

In a medieval castle, there were two layers of walls. In case the enemy breached the first wall, they would be caught in the open space in between the walls, which was nicknamed the killing fields.
You want to keep your own “killing fields” clear by reducing places for bed bugs to hide. That means decluttering your apartment.
- Make sure your floor is kept free of clutter.
- Go green by recycling paper and storing documents digitally.
- Donate toys, furniture, and clothing you are no longer using to a respected charity.
Bonus tip: In addition to decluttering, you can reduce places bed bugs hide in other ways. Recycle your cardboard storage boxes and replace them with ones made of post-consumer plastic. Plug all unused electrical outlets with outlet covers. Scrape away peeling paint and touch up the walls (we know you’ve been meaning to get rid of that horrible shade of mauve in the kitchen anyway).
Approximate cost to your treasury: Because you are getting rid of things, not adding things, this is the most economical step. Outlet covers can be purchased by the dozen for less than $5. However, storage bins can cost in the $15-$100 dollar range depending on quality and size.
#4: Dig Your Moat
What you’ll need:
- Passive bed bug indicators for all legs of your bed, fabric chairs, futon, and couch
You’ll want to create a moat around your bed (and optionally your other fabric furniture).
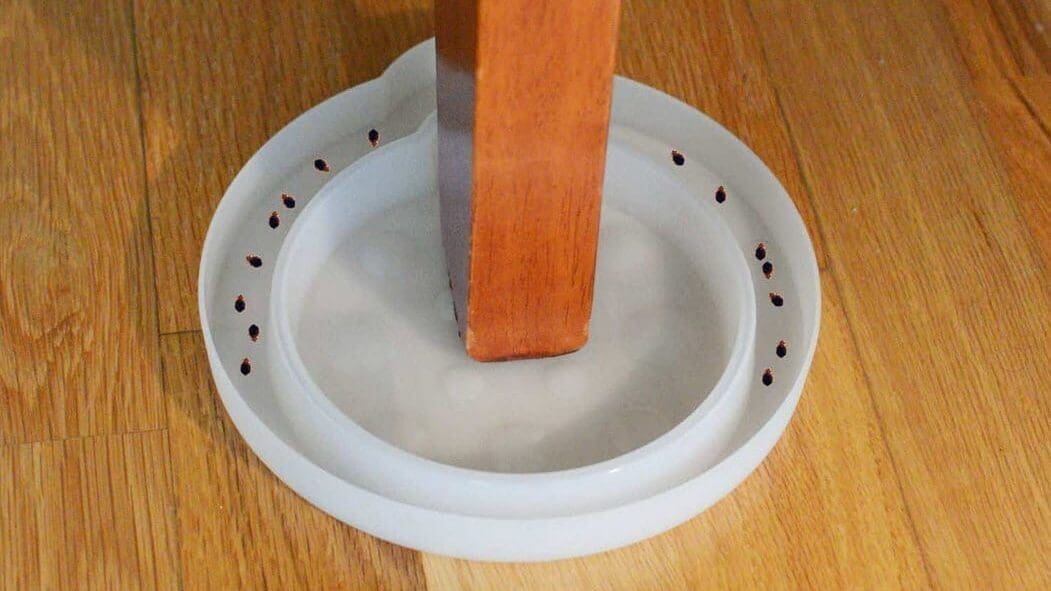
Place passive bed bug indicators (also sometimes called “monitors” or “detectors”) under the legs of your bed or chair. These interceptors have a central cup in which the leg of the bed or furniture sits, in which any bed bug climbing down would be trapped in. Any bed bugs crawling up from the outside would be trapped in a separate outer ring.
Indicators under the legs of your furniture only work if your furniture is not touching the wall. Be sure to keep your bed a foot away from the wall, and tuck in your blankets so they don’t brush on the floor; (dust ruffles are not ideal).
Don’t store things under your bed that can brush the underside. Lift up your moat’s drawbridge; that is, don’t charge your phone in such a way that the cord stretches to the bed.
In short, make bed bugs crawl through the indicators if they want to get to your bed.
Approximate cost to your treasury: Indicators vary widely in quality and price, from $10-$40 per pack. They can be sold in 4-packs, 8-packs, or 12-packs.
#5: Check for Spies
What you’ll need:
- Laundromat
- Optional tools: two shoe trays, CimeXa dust or diatomaceous earth, spray bottle, mask, hanging garment bags, washable duffle bag
Of course, the most dangerous enemies are the spies that sneak in through the castle gates. It is important that you are on guard when you bring high-risk items in from the outside world.
Items with a high risk of transporting bed bugs include luggage, shoes, books, clothes, and anything second-hand.
First and foremost, don’t pick up items from the street. I’ll say it again: no dumpster diving! Get your second-hand items from a respected dealer and ask what precautions they take against bed bugs. Ask if they have regular canine bed bug inspections and if they treat incoming items. Visually inspect second-hand items before you bring them home.
Launder all garments when you come back from a trip, not just those you’ve worn. You can also store your coats in vacuum-sealed garment bags for added protection. Personally, I gave up on suitcases entirely; instead, I travel with a washable duffle bag.
As for shoes, there is no easy answer. My DIY compromise is to have a smaller shoe tray inside a larger shoe tray. To the larger shoe tray, I carefully applied a thin layer of CimeXa dust or 100% food-grade diatomaceous earth. CimeXa dust and diatomaceous earth will dehydrate any bed bugs that crawl through it within 10 days, but please note it can be a bit tricky to apply safely to surfaces.
If using diatomaceous earth, make sure you buy the right type (amorphous not crystalline), don’t over apply, and wear a good quality mask when applying it. CimeXa dust doesn’t contain any crystalline silica component, works faster, and you can use a puffer applicator.
Approximate cost to your treasury: Food-grade amorphous diatomaceous earth is about $2 a pound. Shoe trays run $5-$40. Spray bottles can be obtained for a few dollars. Dust masks are about $10 to $50. Vacuum-sealed garment bags run anywhere from $7 to $25. Washable duffle bags range from $20 to $60.
#6: Staff Your Guardhouse
What you’ll need:
- Portable heater
- Thermometer
- Optional tools: bed bug heater, freezer, sealed plastic bags
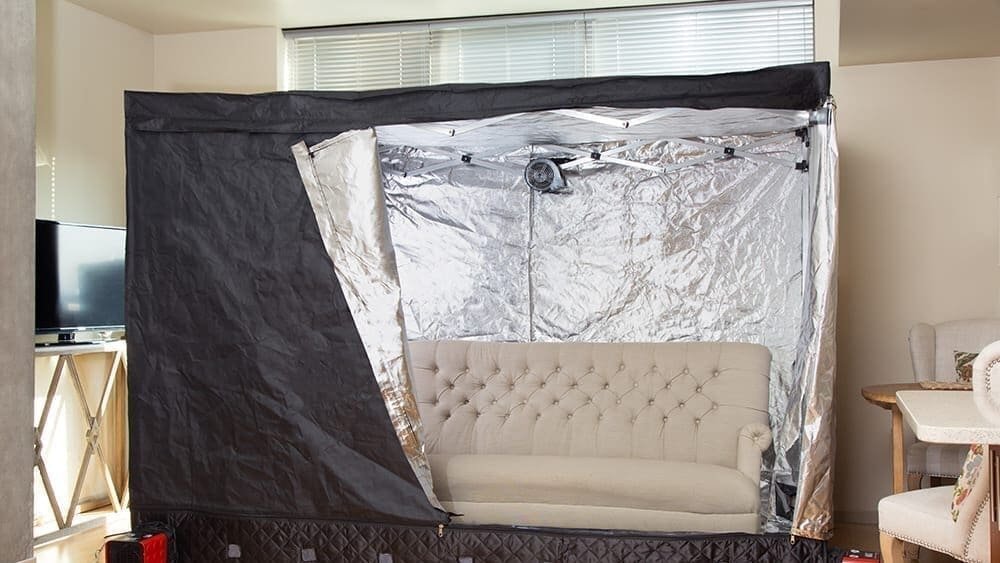
There is another, slightly pricier way to deal with outside items: staff your guardhouse with a bed bug heater. These are great tools, ranging from the size of a suitcase to the size of a tent.
Bed bug heaters slowly bring your items to the temperature bed bugs and their eggs die at, 120 degrees Fahrenheit. Many heaters have their heating elements on the outside, causing bed bugs to flee inward where they are cooked to death.
However, please note that heaters can loosen the glue in certain shoes and books. They must be used exactly as instructed; if there is a single pocket of cooler temperatures inside your items, the bed bugs will survive.
You may have also heard you can get rid of bed bugs by putting items in the freezer in a sealed bag. This is not ideal. Most household freezers do not have a consistent enough temperature to kill bed bugs.
For this to work, you would need to set your freezer to 0 degrees fahrenheit and not open it for 4 days to 2 weeks, depending on the size of the item. If you have a freezer you can avoid opening for that long, make sure you test it with a thermometer before you use it on bed bugs.
Approximate cost to your treasury: Bed bug heaters vary widely based on size and quality, from $175 to $600. You will also see heaters in the several thousand dollar range, but these are only for use by professionals for heating an entire house; stay away from these for DIY. Freezer thermometers are about $7.
#7: Call Upon Your Allies

You may have been reading this list wondering where you will find the time for all these DIY bed bug-proofing solutions. MMPC can professionally bed-bug-proof your apartment using many of the methods described here.
We also have access to procedures that might be a bit more difficult to DIY (such as applying a layer of diatomaceous earth inside the walls themselves).
If you consider the high risk of bed bugs in the city, allying yourself with professional services to supplement your own diligence makes sense.
Conclusion
Hopefully, you now have a better idea of how to make your apartment an impenetrable, bed-bug-proof castle.
- Repair your castle walls to prevent bed bugs from coming in from other apartments.
- Fortify your keep by encasing your mattress, box spring, and pillow.
- Set up a killing field by reducing the places bed bugs can hide.
- Dig your moat using indicators.
- Check for spies sneaking in with high-risk items.
- Staff your guardhouse with heat and cold.
- Finally, call in the cavalry of bed bug professionals.
If you do all this, you can stand tall in your castle, knowing you are doing your part to defend this great land of New York City from the relentless enemy of bed bugs